 Deskstar
Create your workspace and invite your team
Set up your workspace, check its basic settings and invite the people you work with.
Create your Deskstar workspace, tune its basic settings and invite the people you work with. This takes about ten minutes, and it's the first thing to do before you connect any channels.
Create your workspace#
When you sign up, Deskstar asks you to confirm your email address. Then you set up the workspace itself.
You'll be asked for four things:
- Name: your company's internal name. Only your team sees it.
- Public name: the name your customers see, for example as the sender name on email. Use the name customers know you by.
- Slug: the short name in your workspace's web address. Pick it carefully, because it can't be changed afterwards.
- Your public name: the name customers see on your replies, such as the "Jane" in "Jane from Acme".
Next you choose a plan and start a free trial. The trial lasts 14 days. You can change the plan later under Billing.
Once the trial is started you land in your workspace.
Deskstar also sets up a few sensible defaults for you, so you can start straight away:
- A Default Business Hours schedule, Monday to Friday, 09:00 to 17:00
- A Default SLA Policy that sets response targets for every docket
- A Standard customer tier
You can change all of these later. The articles on business hours and SLA policies explain how.
Check your workspace settings#
Go to Settings → Workspace to review the basics.
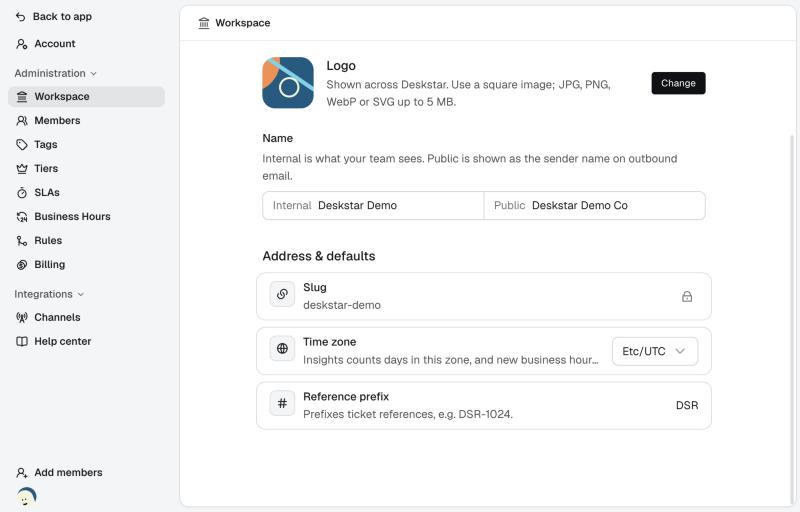
- Logo: upload a square JPG, PNG, WebP or SVG image of up to 5 MB. It appears across Deskstar.
- Name: the internal and public names you chose when you set up. Edit either one and click away, and it saves.
- Slug: shown with a lock, because it can't be changed.
- Time zone: Insights counts days in this zone, and new business hours schedules start in it. Set it to where most of your team works.
- Reference prefix: the letters at the start of every docket reference, such as the
DSRinDSR-HWQ1XZ. Customers see the reference in email subject lines, so choose something short and recognisable.
Invite your team#
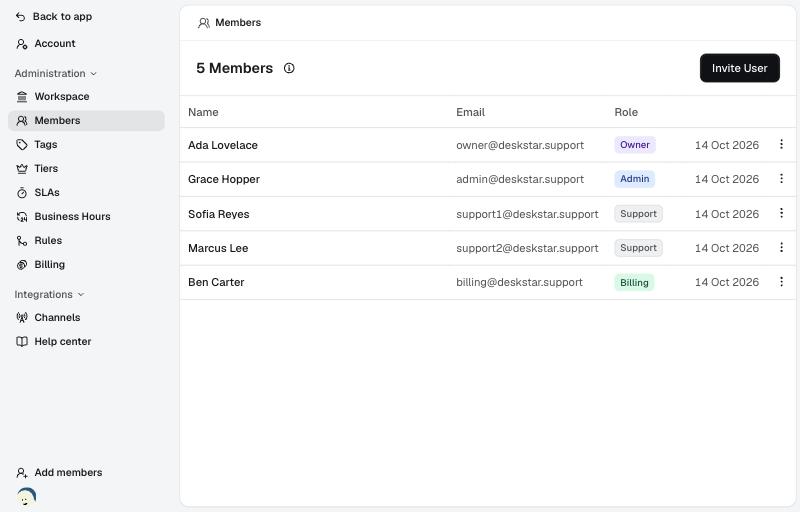
Go to Settings → Members and click Invite User. You can also click Add members at the bottom of the left-hand sidebar from anywhere in Deskstar.
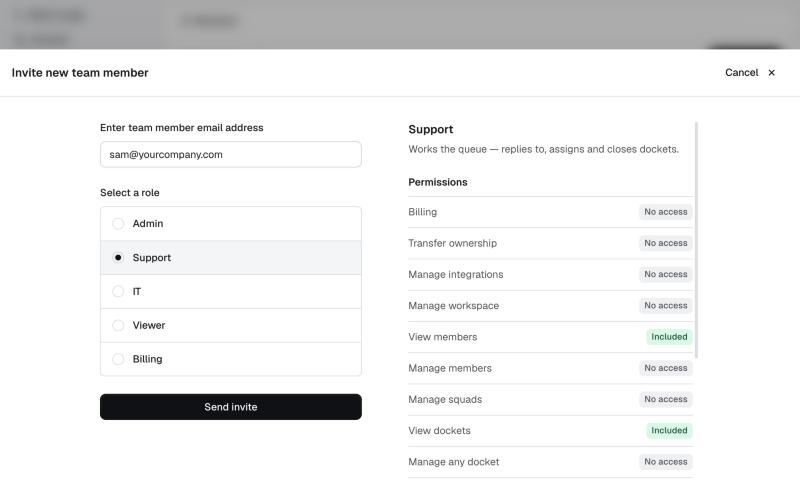
In the invite panel:
- Type the person's email address.
- Choose their role. The panel shows a list of exactly what that role can and can't do, and it updates as you click through the roles.
- Click Send invite.
The person gets an email with a link. They sign up, or sign in if they already have an account, and are shown a screen asking them to accept. Once they accept, they appear in your members list as active.
Anyone you invite as an Owner, Admin or Support takes a paid seat. Viewers, IT and Billing members are free.
Manage your members#
The three dots at the end of each member's row open their menu.
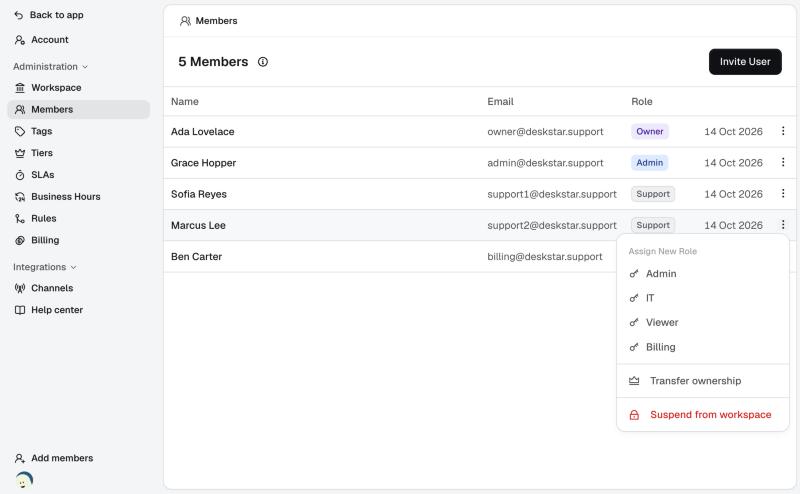
- Assign New Role changes their role straight away.
- Resend invite, for people who haven't accepted yet or who declined, sends the email again.
- Revoke invite cancels an invitation that hasn't been accepted.
- Suspend from workspace takes away a person's access without deleting them. Their open dockets are reassigned. Choose Restore access to bring them back.
- Transfer ownership, available only to the Owner, hands the workspace to another active member. You then become an Admin. You can't undo it yourself.
Click a member's name to open their page. There you can see their role and status, switch Automatic assignment on or off, and set their availability. Automatic assignment decides whether Deskstar hands that person new dockets on its own. It only applies to people who work the queue.
What to do next#
With your team in, the next jobs are connecting the places customers write to you and setting the response times you want to hold yourselves to.
Receive customer emails and reply from your own address.
Set up business hoursDefine when your team is working, so response timers only run then.
Set up SLA policiesSet response and resolution targets for your dockets.
Roles and what each can doWhat every role can see and do, and which ones take a paid seat.