 Deskstar
Set up the Email Channel
Forward your support address to Deskstar, add two DNS records so replies come from your own domain, and switch the channel on.
Connect your support email address so customer emails arrive in Deskstar as dockets, and your replies go back out from your own address. Setup takes about fifteen minutes, plus however long your DNS changes take to appear.
How it works#
Customers keep writing to the address they already know, such as help@yourcompany.com. You forward that mailbox to a private Deskstar address, and every email that arrives there becomes a docket, or joins an existing one.
When your team replies, Deskstar sends the email from your support address, so it looks like it came from you. To make sure those emails reach the inbox and aren't marked as spam, you add two DNS records to your domain. They prove to receiving mail servers that Deskstar is allowed to send on your behalf.
Customers see your replies as coming from your name from your workspace, followed by your support address. A reply from Ada Lovelace at Acme would show as "Ada Lovelace from Acme help@acme.com".
Set it up#
-
Enter your support address
Go to
Settings → Channels → Email, type the address your customers send support requests to, and click Save and Continue.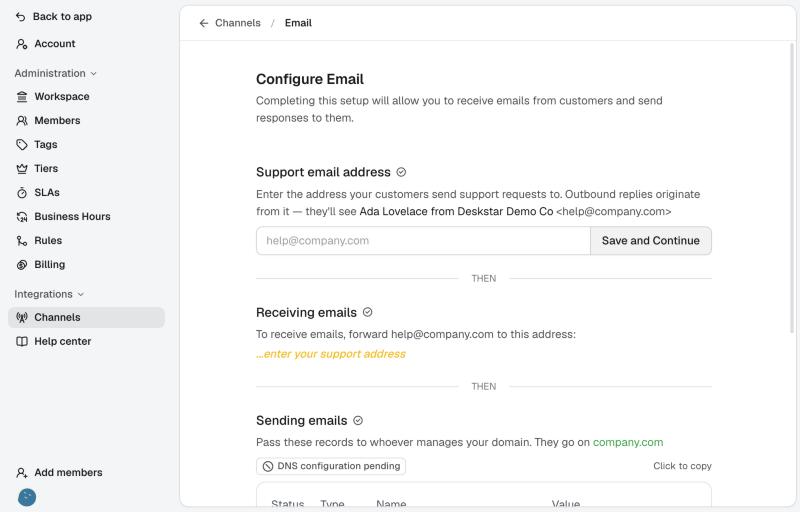
Settings → Channels → Email, before anything is set up. The address must be on a domain you control, for example
help@yourcompany.com. An address on a free provider such as Gmail or Outlook won't work, because you can't add DNS records to someone else's domain. Deskstar takes the sending domain from the part after the@.Once you save, Deskstar registers your domain and prepares the DNS records you'll need. This takes a moment.
-
Forward your support mailbox to Deskstar
Under Receiving emails you'll see a forwarding address, a long string followed by
@inbound.deskstar.support. Copy it.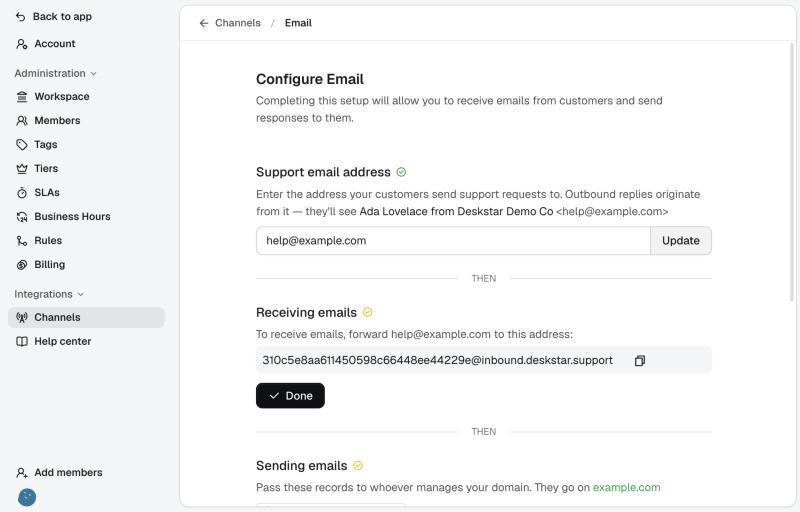
Your private forwarding address. Click it to copy. In your email provider (Google Workspace, Microsoft 365 or wherever your support mailbox lives), set up forwarding from your support address to this address. Keep a copy in the original mailbox if you want a record there too.
When forwarding is working, click Done under the address. Deskstar can't see how your mailbox is set up, so this button is you confirming it.
-
Add the DNS records
Under Sending emails, Deskstar lists two records. Pass them to whoever manages your domain, or add them yourself in your DNS provider.
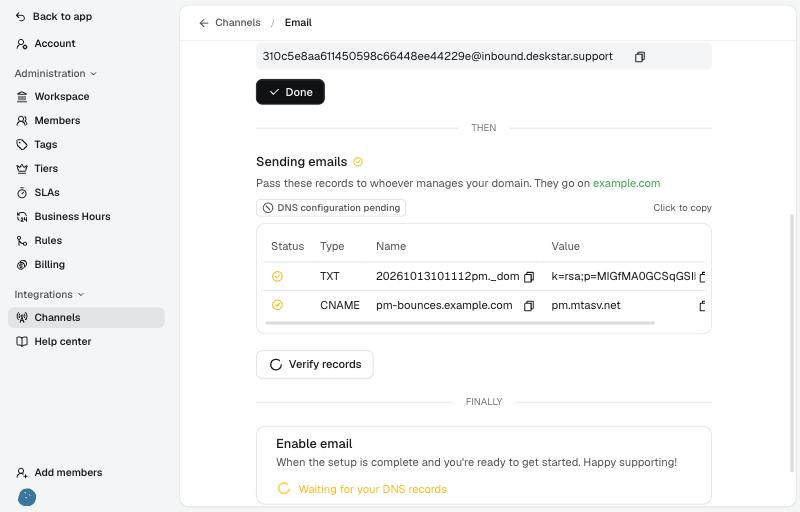
A DKIM record (TXT) and a Return-Path record (CNAME). - A TXT record, the DKIM record, which lets receiving servers check that your emails really come from you.
- A CNAME record, the Return-Path record, which handles bounced emails.
Click any name or value to copy it exactly. Add both records with the type, name and value shown. Leave the TTL on automatic if your DNS provider offers it.
DNS changes can take anything from a few minutes to several hours to spread. Deskstar checks for the records every fifteen minutes on its own. To check straight away, click Verify records.
When both records are found, the status changes to Verified.
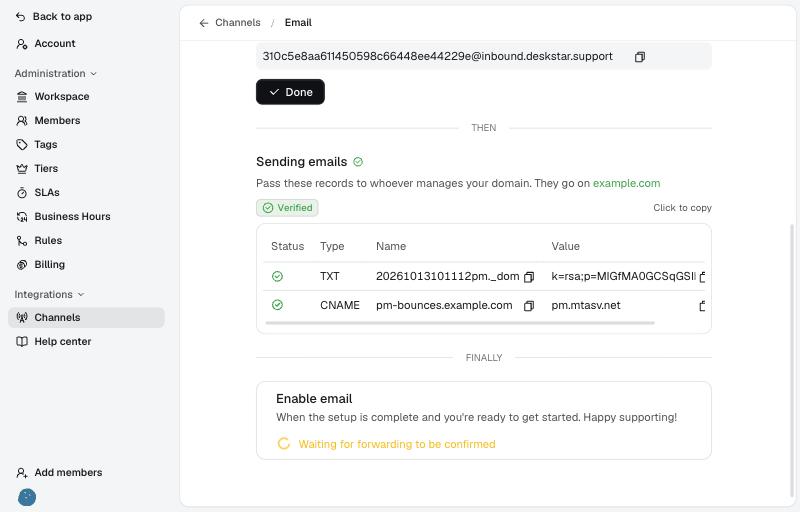
Both records found. Verified. -
Switch the channel on
When forwarding is confirmed and the records are verified, the page changes to your email settings. Scroll to Manage channel and click Enable.
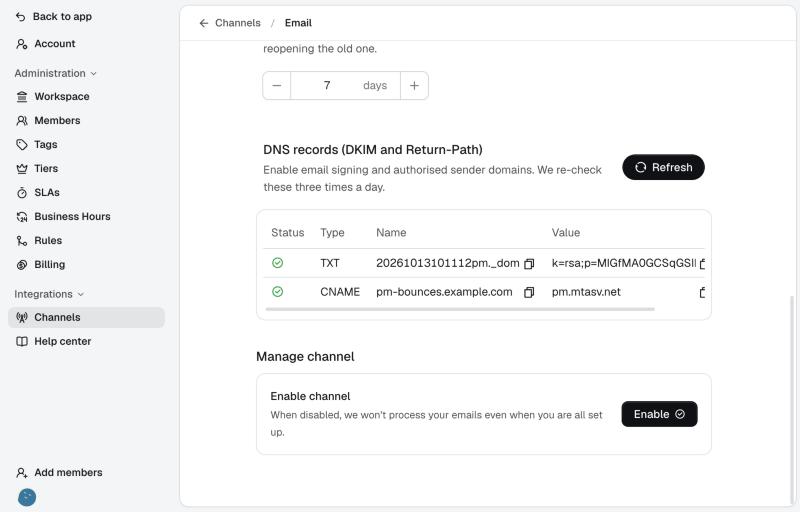
Enable channel, at the bottom of the page. If something is still missing, Deskstar tells you: either "domain is not verified yet" or "forwarding has not been confirmed yet".
When the channel is on, the button changes to Disable.
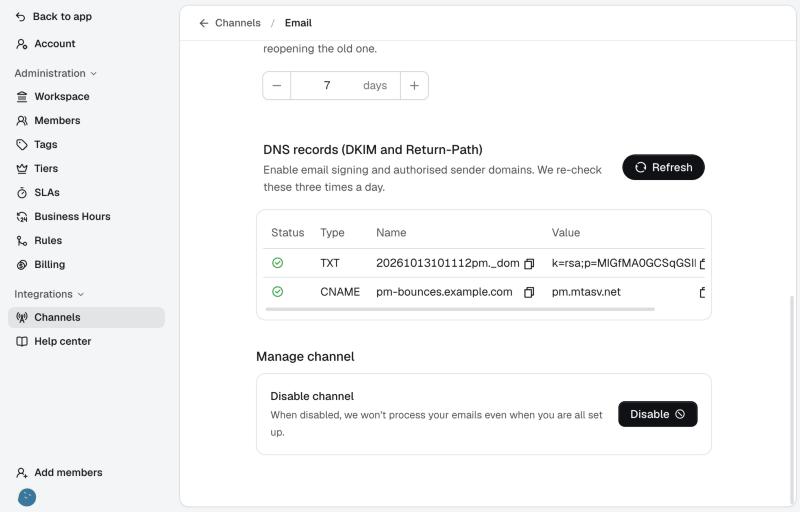
The channel is live.
Send a test email#
Send an email to your support address from a personal address, such as your own Gmail. It should appear in Deskstar as a new docket shortly afterwards. Open it and reply. The reply reaches your inbox from your support address, with the docket's reference, for example [DSR-ABC123], in the subject.
Reply to that email from your personal address and the reply joins the same docket. Deskstar recognises replies by the reference in the subject, by a private reply address on each email, and by the email's thread headers, so it keeps working even if a customer edits the subject line.
If nothing arrives, see Troubleshooting below.
Your email settings#
Once you're set up, the same page holds your settings.
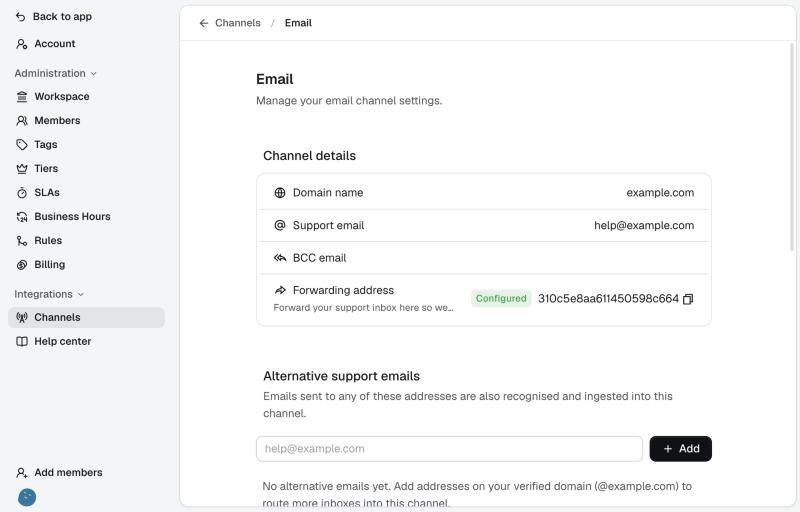
The Channel details card shows your domain, support address and forwarding address, and whether forwarding is Configured. Click the copy button to copy the forwarding address again.
Alternative support emails#
You may have more than one address customers write to, such as billing@yourcompany.com as well as help@yourcompany.com. Type each extra address under Alternative support emails and click Add. Emails sent to them are recognised and handled by this channel too.
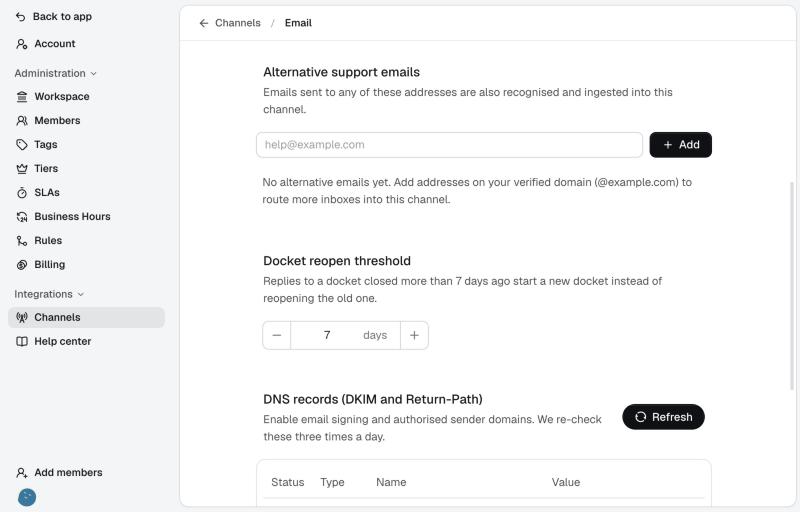
Alternative addresses must be on your verified domain. Also forward each of them to the same Deskstar forwarding address, as you did for your main one.
Docket reopen threshold#
When a customer replies to a docket that is already closed, Deskstar reopens it. But if the docket was closed more than a set number of days ago, the reply starts a new docket instead. Choose any number from 1 to 30. The default is 7.
Keeping it healthy#
Deskstar re-checks your DNS records three times a day. If one goes missing, for example because the domain was moved or a record was deleted, a red banner appears at the top of the email page with the message "One of your DNS records is missing", or "DNS records are no longer resolving" if both are gone. Outbound email may be rejected until you restore the records. Add them back, then click Re-check.
You can see the records any time under DNS records (DKIM and Return-Path) on the email page. Refresh checks them immediately.
To pause the channel, click Disable under Manage channel. While it's off, Deskstar doesn't process your emails. Click Enable to resume.
Troubleshooting#
The DNS records never show as Verified
Check that both records were added exactly as shown, on the right domain, with the name, type and value copied in full. Some DNS providers add your domain to the end of the name automatically, so a name that already ends in your domain can end up doubled. If you added them recently, wait and click Verify records again. Deskstar keeps checking for about two days.
I can't click Enable
Enabling needs two things: verified DNS records and confirmed forwarding. Click Done under Receiving emails once forwarding is set up in your email provider, and make sure the sending records show Verified.
Emails to my support address aren't appearing
Check that the channel is enabled, that forwarding from your support mailbox to the Deskstar address is switched on and was saved in your email provider, and that the email wasn't caught by your own spam filter before it was forwarded. Try sending a message from a different address.
A customer replied but it started a new docket
The docket was closed longer ago than your Docket reopen threshold, so the reply opened a new one. Increase the threshold if you'd like replies to reopen older dockets.
Replies from Deskstar go to spam, or bounce
Your DNS records are missing or no longer resolving. Look for a red banner on the email page, add the records back and click Re-check.
An extra address isn't being picked up
The address must be on your verified domain, and the mailbox must also forward to your Deskstar forwarding address. Adding it to Alternative support emails tells Deskstar to accept it. It doesn't set up forwarding for you.